
Fireblocks
ETH Staking via Fireblocks + Luganodes
Step-by-Step Staking Process
Video Guide
Guide
Step 1: Access and Log In
Head over to our Native Staking Dashboard.
Enter your registered email ID and password, then click on "Log In".
The dashboard includes three main sections: Staking, Portfolio, and FAQs, accessible via the top pill menu.
Step 2: Connect Your Wallet via Fireblocks
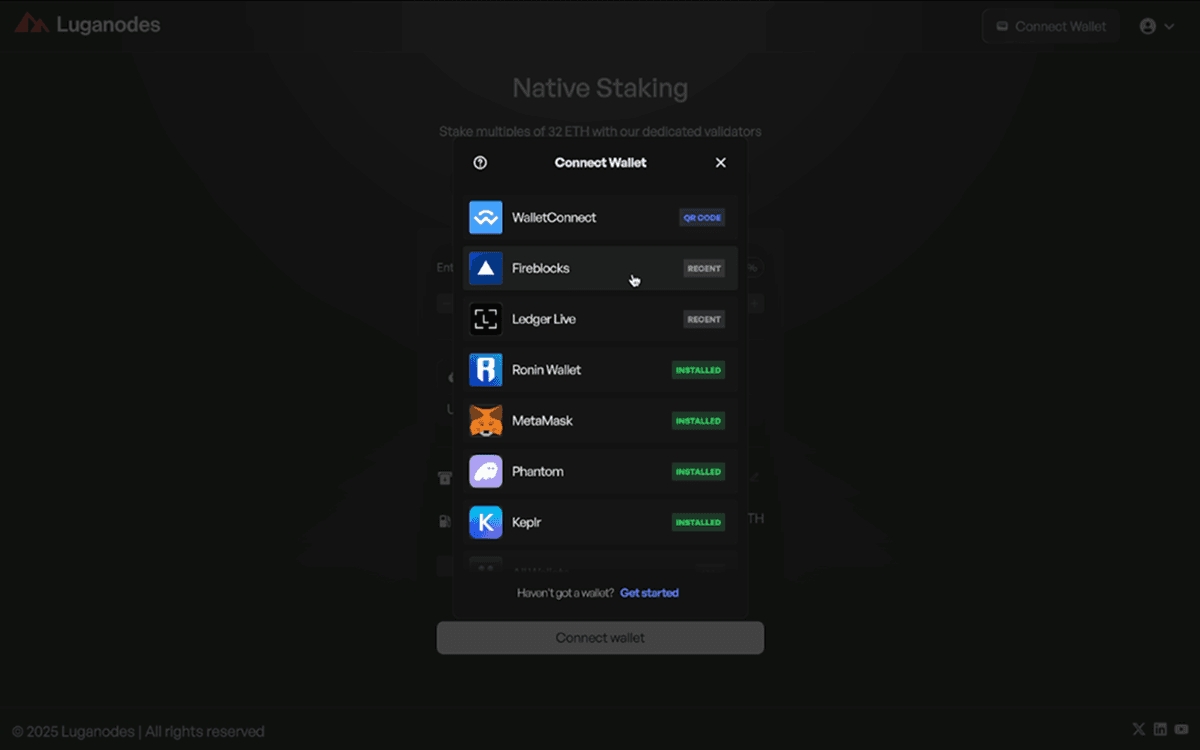
Click on the "Connect Wallet" button.
Select Fireblocks from the available options.
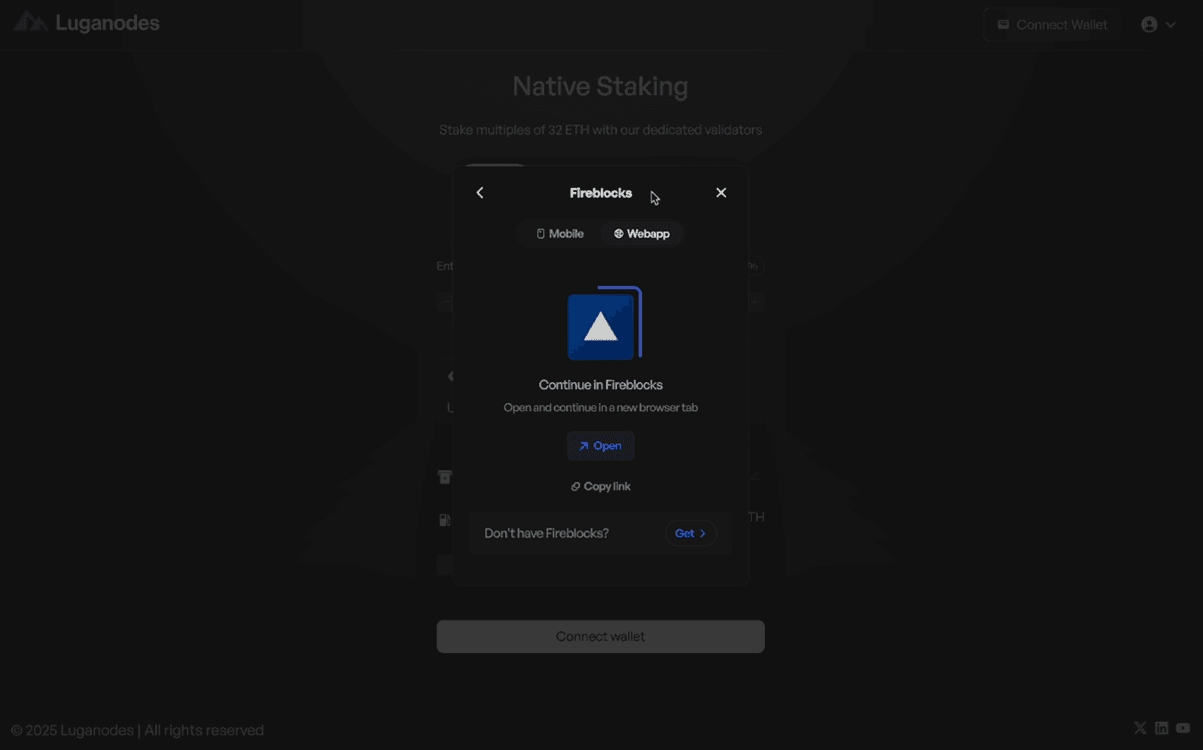
Click on the "Webapp" tab, then click "Open", which will redirect you to your Fireblocks Console in a new browser tab.
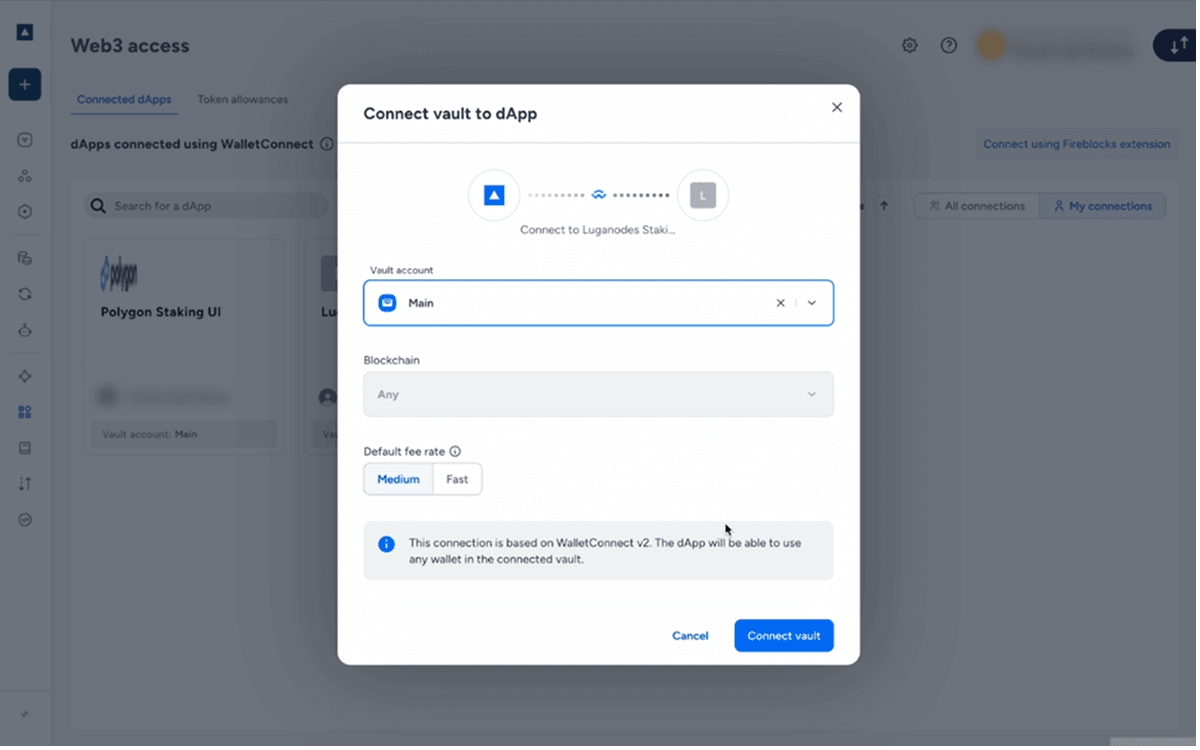
In the Fireblocks Console, select the Vault account holding your ETH.
Click on "Connect Vault" to establish a connection.
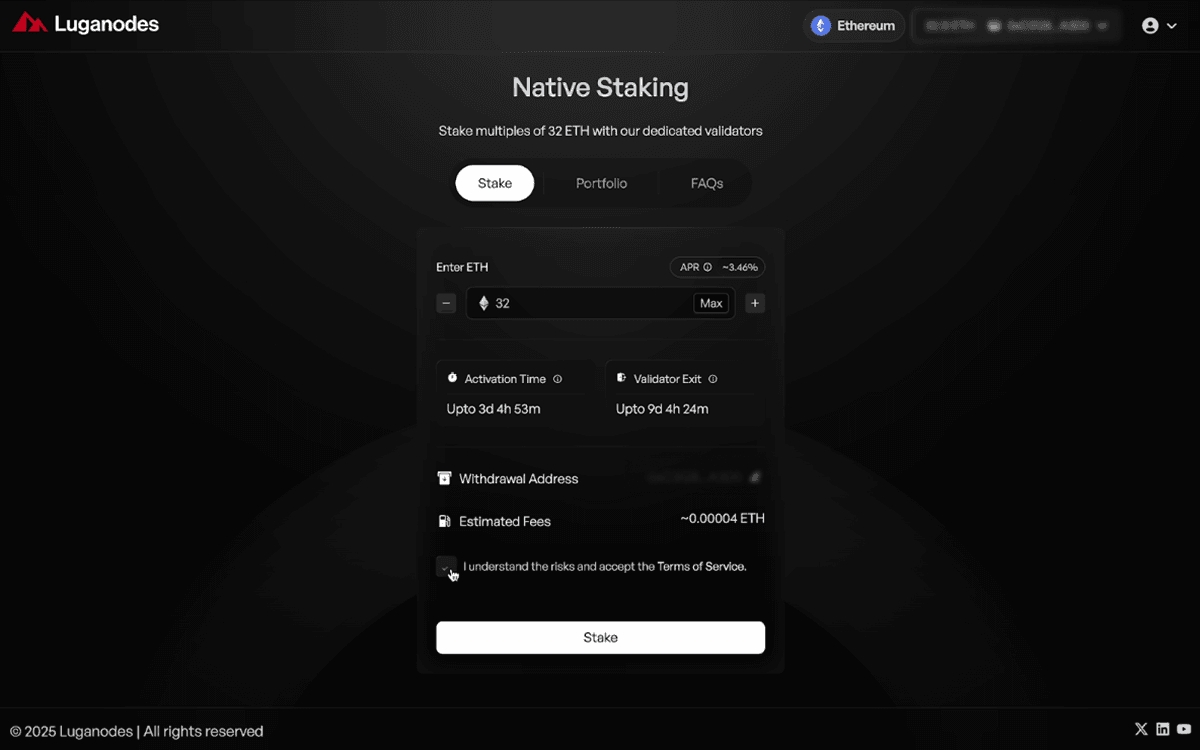
Step 3: Stake ETH
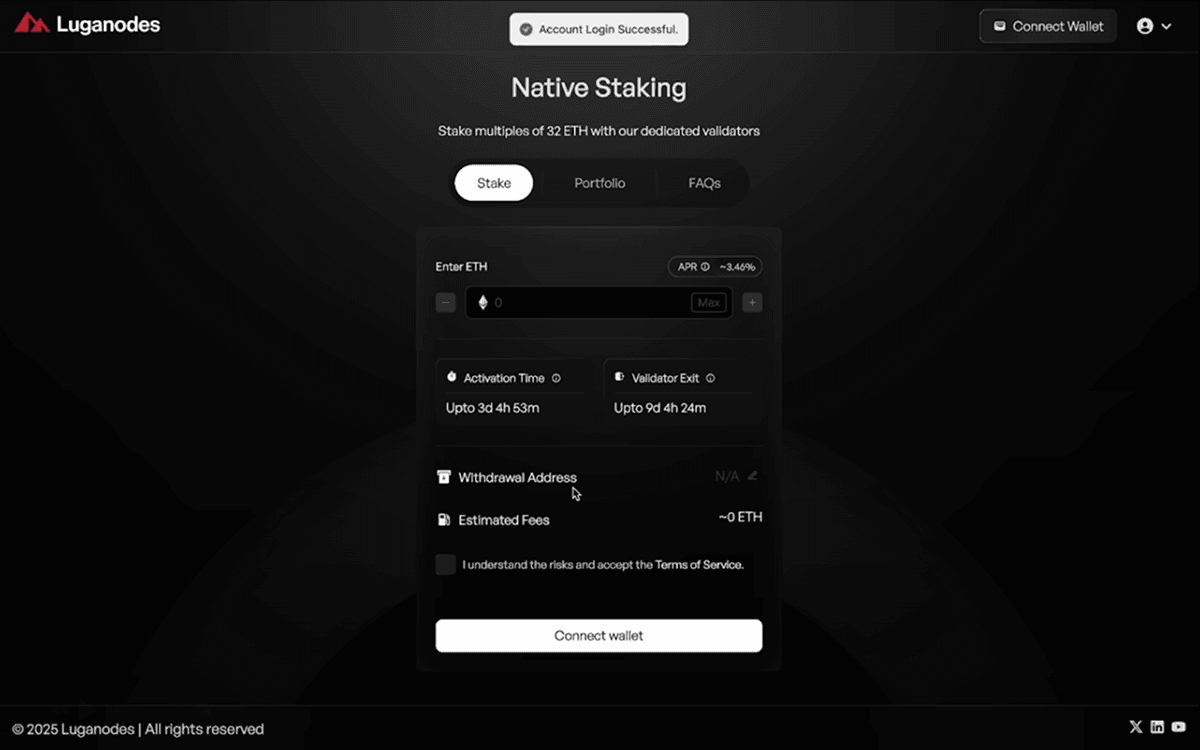
Return to the Native Staking Dashboard.
Enter the amount of ETH you wish to stake (must be in multiples of 32 ETH).
Review the activation time, validator exit time, and estimated APR.
Accept the Terms of Service and click on "Stake".
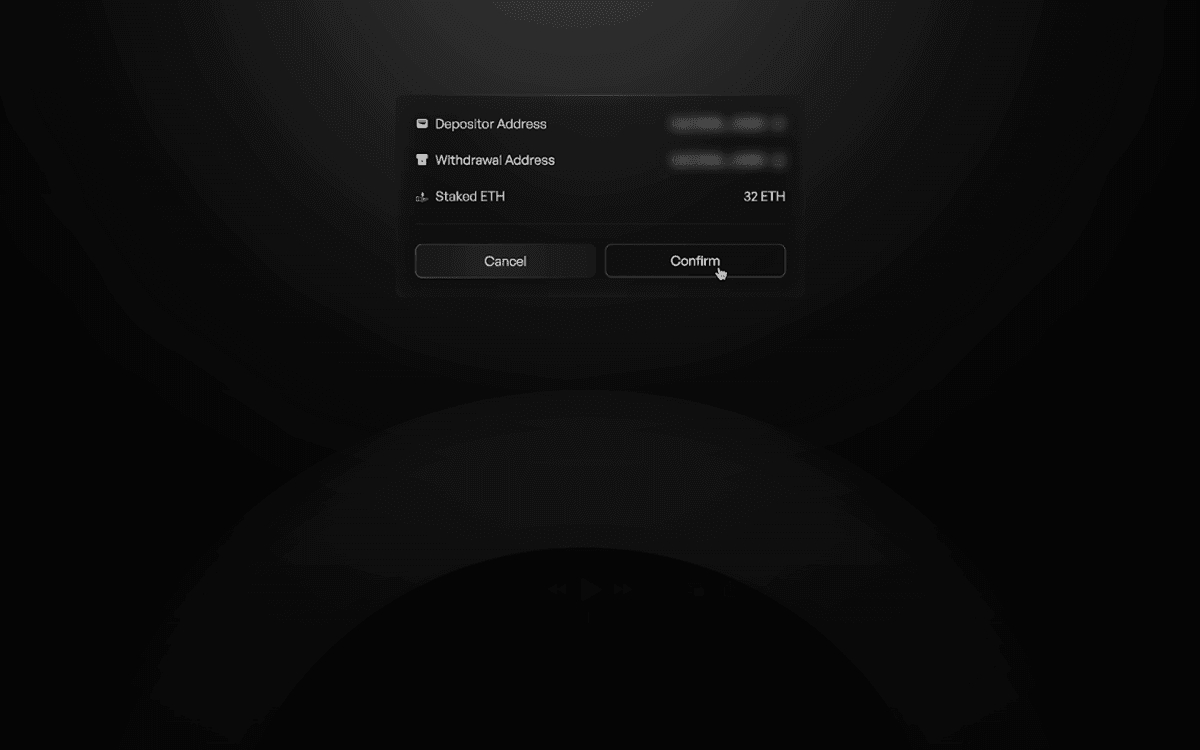
Step 4: Confirm the Transaction
A confirmation window will appear—review the transaction details carefully.
Click on "Confirm" to proceed.
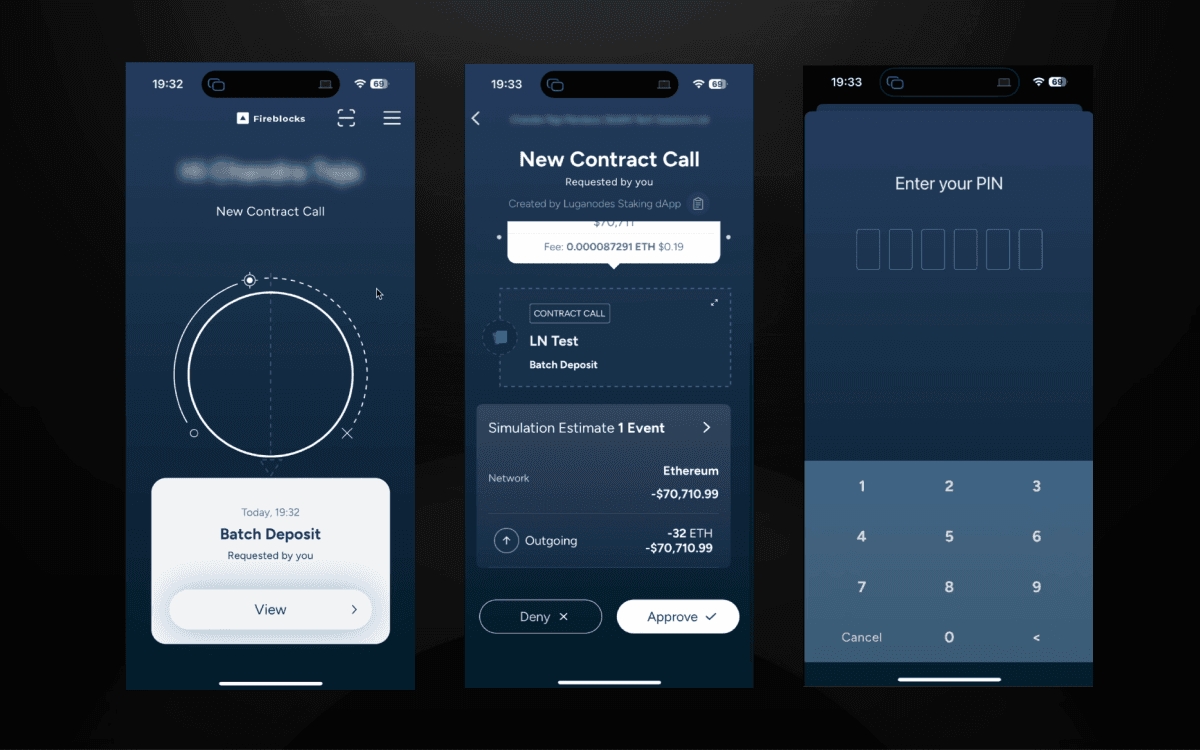
Step 5: Approve the Transaction in Fireblocks Mobile App
Open the Fireblocks Mobile App.
Click on "View" to check the pending transaction.
Verify the transaction details again and click on "Approve".
Enter your Fireblocks PIN to finalize the approval.
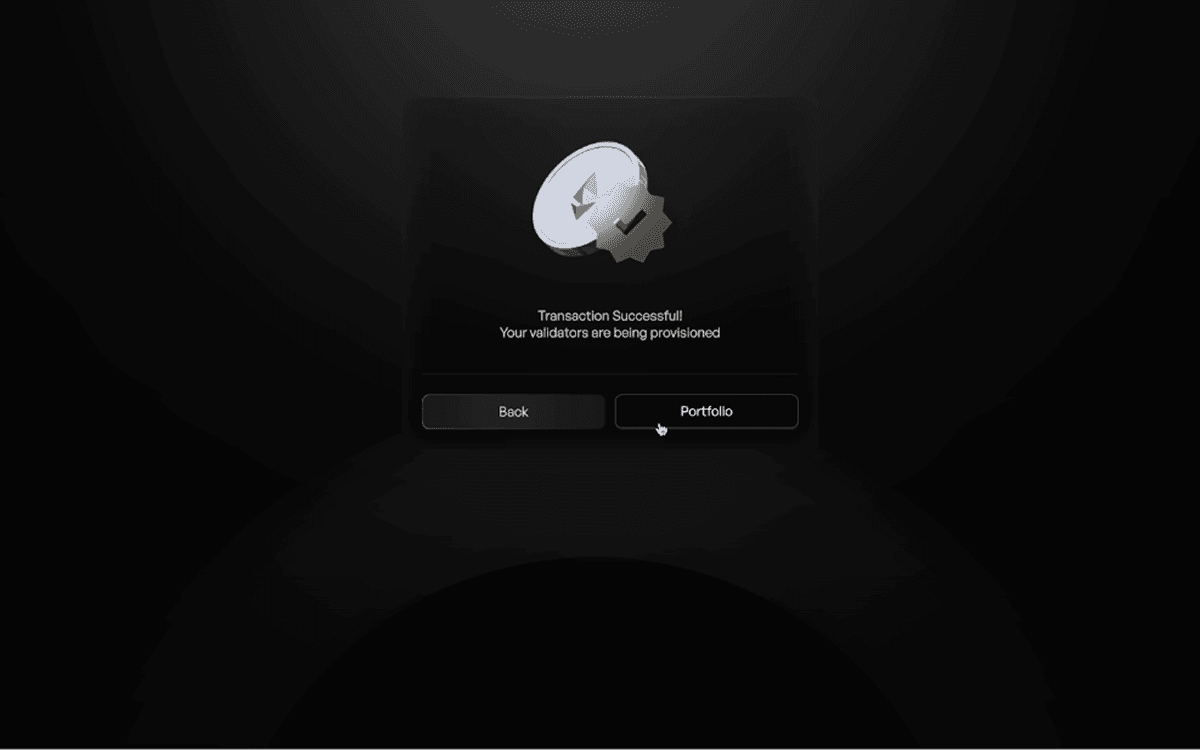
Step 6: Final Confirmation & Tracking
Return to the Native Staking Dashboard and wait for the transaction to process.
Once completed, a success message will appear.
Click on the "Portfolio" tab to check your total staked ETH and track your rewards.
Validator Exit Process
Video Guide
Guide
Step 1: Navigate to the Portfolio Section
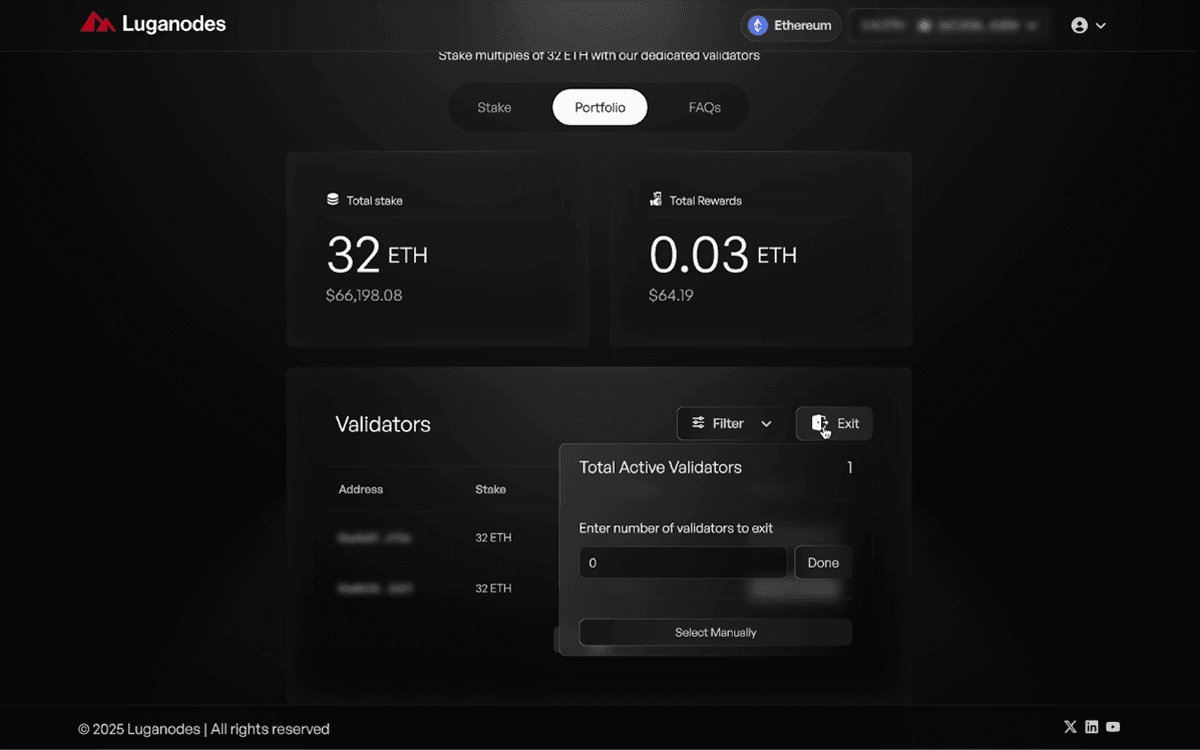
Head over to the Portfolio section of the Native Staking Dashboard.
Step 2: Initiate Validator Exit
Click on the “Exit” button. A menu will appear, prompting you to enter the number of validators you wish to exit. Once entered, click “Done”. If you prefer to manually select the validators, click on “Select Manually”.
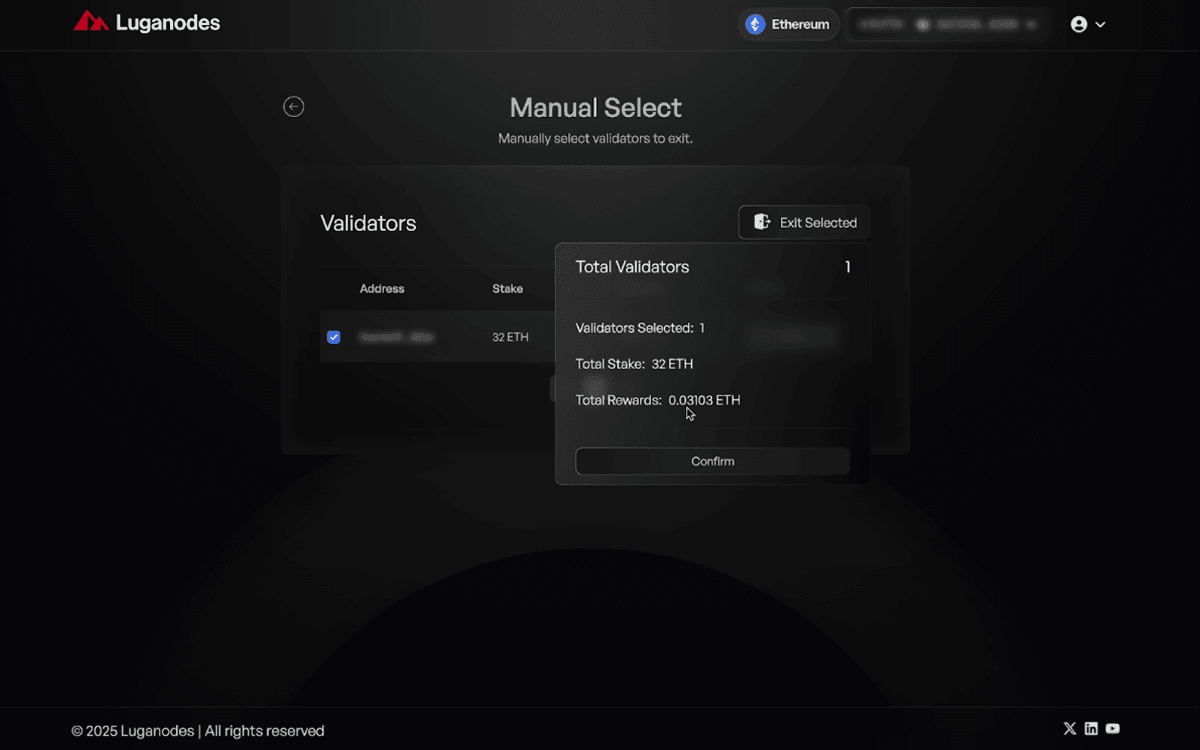
Step 3: Manual Validator Selection (Optional)
In the “Manual Select” page, use the checkboxes to select the validators you wish to exit. After making your selection, click “Exit Selected”. You will be prompted to confirm your choice.
Step 4: Approve the Exit in Fireblocks Mobile App
Open the Fireblocks Mobile App to approve the exit. Follow the same steps as in Step 5 of the staking guide to verify and approve the transaction.
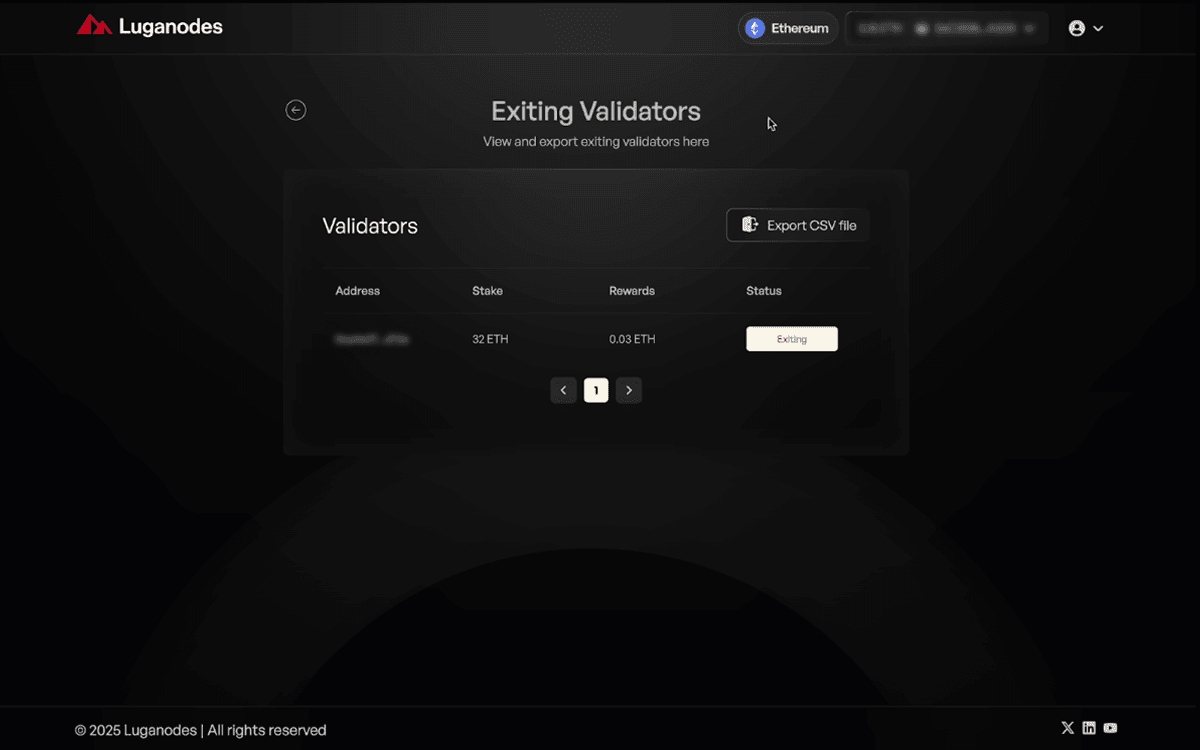
Step 5: Monitor the Exiting Validators
Once the transaction is confirmed, you will receive a message indicating that all your selected validators are exiting. Click on “View Exiting” to track the progress of the exiting validators in real-time.
Last updated